- Blog
- Merry Christmas
- Tying It All Together: How to Make a Perfect Merry Christmas Bow
As the holiday season approaches, gift-wrapping takes center stage, and what better way to add that final touch of festive flair than with a beautifully crafted Christmas bow? Whether you're an expert gift-wrapper or a novice just learning the ropes, creating a perfect bow can elevate your presents to a whole new level of Christmas magic.
In this article, we'll unravel the secrets of tying the perfect merry Christmas bow, so get ready to impress your loved ones with the most beautifully adorned gifts under the tree!
The Importance of a Merry Christmas Bow
The Merry Christmas bow is a small detail that holds significant value in gift wrapping. It adds a touch of elegance and festive spirit, making the gift stand out and creating a memorable experience for the recipient. A carefully crafted bow not only adds visual appeal but also shows the thought and effort put into the gift. It communicates love, care, and attention to detail.
Whether it's a classic bow or a layered one, the Merry Christmas bow serves as the finishing touch that completes the overall presentation of the gift. By mastering the art of creating a perfect bow, you can elevate your gift-giving game and make a lasting impression on your loved ones.
The Perfect Finishing Touch
The perfect finishing touch to any gift is a beautifully crafted Merry Christmas bow. It adds an extra layer of elegance and sophistication, making the present stand out among the rest. A well-made bow not only completes the overall look but also enhances the recipient's excitement and anticipation. Experimenting with different ribbon widths and colors can create various effects, from playful and vibrant to elegant and traditional.
Additionally, consider adding matching ribbon accents or decorative ornaments to make the bow truly unique. Remember, a thoughtfully tied Merry Christmas bow showcases your attention to detail and adds that special touch that sets your gift apart.
Choosing the Right Ribbon
Size and Width
When it comes to creating a merry Christmas bow, choosing the right size and width of the ribbon is important. A wider ribbon, typically around 2-3 inches, works well for larger gifts and adds a bold, eye-catching element. For smaller gifts, a narrower ribbon, around 1 inch, creates a more delicate and elegant look. The size and width of the ribbon should be proportional to the size of the gift, ensuring the bow doesn't overpower or get lost. Experimenting with different sizes and widths allows you to find the perfect balance for each gift.
Finding the Right Proportions
When finding the right proportions for your Merry Christmas bow, it's important to consider the size of the gift you are wrapping. The bow should be in proportion to the present to create visual harmony. For smaller gifts, opt for a narrower ribbon width to avoid overpowering the package. Conversely, larger gifts can handle a wider ribbon that stands out. As a general rule, the width of the ribbon should be roughly 1/3 of the size of the gift.
By selecting the appropriate proportions, you can ensure that your Merry Christmas bow complements the gift without overwhelming it.
Consider the Size of the Gift
When choosing a Merry Christmas bow, it's important to consider the size of the gift. Opt for a bow that is proportional to the gift to create a visually appealing result. For smaller gifts, a delicate and petite bow works well, while larger gifts can handle a more substantial and voluminous bow. For example, wrapping a small jewelry box with a large and extravagant bow would look disproportionate and awkward. Similarly, using a tiny bow for a large appliance would get lost and lack impact. By selecting the appropriate size, your Merry Christmas bow will complement the gift and enhance its overall presentation.
Color and Design
When it comes to choosing the color and design of your Merry Christmas bow, you have plenty of options to make a statement. To match the theme of your gift, consider using colors that complement or contrast the wrapping paper. For a classic and elegant look, pair a red bow with a gold or silver wrapping. Experiment with different patterns and textures, such as polka dots, stripes, or metallic finishes, to add visual interest.
Remember, the goal is to create a cohesive and visually appealing gift presentation that brings joy to the recipient.
Match the Theme of the Gift
When selecting a Merry Christmas bow, it's crucial to match the theme of the gift. This ensures a cohesive and visually appealing presentation.
For example, if the gift has a rustic theme, opt for a bow made from natural materials like twine or burlap. Conversely, if the gift embodies elegance and sophistication, consider a bow made from satin or velvet in a coordinating color. By aligning the bow with the overall theme, you create a harmonious and thoughtful presentation that enhances the recipient's experience. Remember, the Merry Christmas bow should complement the gift, not overpower it.
Experiment with Different Patterns and Textures
Experimenting with different patterns and textures can add an extra touch of elegance and creativity to your Merry Christmas bow. By playing with various designs, you can customize the look to match the recipient's style or the overall theme of the gift. Consider using ribbons with stripes, dots, or even metallic accents for a festive and eye-catching effect. Textured ribbons like velvet or satin can also add depth and dimension to the bow.
Don't be afraid to mix and match patterns and texturesto create a unique and visually appealing presentation. Let your creativity shine through and make your Merry Christmas bow truly stand out.
Mastering the Techniques
Classic Bow
Creating a classic bow is a timeless technique for adding elegance to your merry Christmas gifts. Start by selecting a ribbon in a width that complements the size of the present. Loop the ribbon around your fingers, making a figure-eight shape, and secure the center tightly with a piece of wire. Fluff and shape the loops to create a full, symmetrical bow. Attach the bow to your gift with a piece of ribbon or tape.
Classic bows work well on boxes, bags, and even wine bottles, adding a touch of sophistication to any holiday present.
Step-by-Step Instructions for Creating a Classic Bow
To create a classic Merry Christmas Bow, start with a long ribbon and hold it in your non-dominant hand. Make a loop with the ribbon, making sure one end is longer than the other. Cross the longer end over the shorter one to form a simple knot. Take the longer end and create a loop, then pass it through the knot. Tighten the bow by pulling both ends simultaneously, adjusting the loops and tails as needed for a symmetrical appearance.
Practice this technique until you achieve a beautiful and balanced bow that adds a festive touch to your gift wrapping.
Layered Bow
The Layered Bow is a popular choice for adding dimension to your Merry Christmas Bow. To create a layered bow, start by making a traditional bow with one ribbon. Then, choose a contrasting ribbon and create a second bow using a different technique, such as a twisted or looped bow. Layer the two bows on top of each other, securing them in the center with a wire or twist tie. The layered bow creates visual interest and can be customized to match the theme or colors of your gift.
Experiment with different ribbon textures and widths for unique combinations.
Step-by-Step Instructions for Creating a Layered Bow
Creating a layered bow adds depth and elegance to your Merry Christmas Bow. Start by selecting two ribbons in complementary colors and widths. Cut two strips of each ribbon, varying in length to create the layered effect. Take the longer strip of one ribbon and fold it into a loop, securing it in the center. Repeat with the other three strips. Layer the loops on top of each other, alternating the colors and sizes. Secure the layers together with a twist tie or wire.
Fluff and adjust the loops to create a full and balanced look. Experiment with different ribbon textures and patterns for a unique and festive design.
Adding Special Touches
Using Embellishments
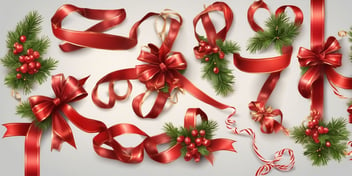
Using embellishments can elevate the charm of your Merry Christmas bow. Ribbons, ornaments, and more can be added to create a festive and eye-catching look.
For example, try attaching mini jingle bells for a joyful sound or incorporating small pinecones and holly berries for a natural touch. You can also use glittery or metallic ribbons to add a touch of sparkle. Experimenting with different embellishments allows you to personalize your bow and make it unique to the occasion. Don't be afraid to get creative and have fun with it!
Ribbons, Ornaments, and More
When it comes to creating a Merry Christmas Bow, adding ribbons, ornaments, and other embellishments can elevate the overall look. These decorative elements help to enhance the festive appeal and make the bow stand out even more. Consider incorporating festive charms, small ornaments, or even tiny bells to add a touch of whimsy and sparkle. You can also experiment with different ribbon textures, such as satin, velvet, or metallic, to create varied and eye-catching bows.
The key is to strike a balance between adding embellishments that complement the overall design without overwhelming the bow itself.
Personalized Tags
When it comes to a Merry Christmas Bow, personalized tags can add a special touch. These tags allow you to create meaningful messages or add the recipient's name, making the gift feel more personal. You can opt for handmade tags with festive designs, or use printable templates for a polished look. Personalized tags not only enhance the overall presentation of the gift but also show the recipient that you took the time and effort to make it extra special.
Whether it's a heartfelt message or a simple "Merry Christmas," personalized tags can make a big impact on the recipient's experience.
Creating Meaningful Messages
Adding personalized tags to your Merry Christmas Bow is a simple yet powerful way to make your gift more memorable. Instead of relying on generic phrases, take a moment to craft a meaningful message that reflects your relationship with the recipient. For example, you can write a heartfelt note expressing gratitude or share a cherished memory. Keep the message concise and sincere, allowing it to evoke emotions and create a personal connection. By adding these thoughtful messages, you can show your loved ones how much you care and make the gift-giving experience even more special.
Wrapping up
Want to make the perfect bow for your Christmas presents? Look no further! This article provides a step-by-step guide on how to create a flawless, festive bow that will impress everyone. From selecting the right ribbon to mastering the various techniques involved, you’ll learn everything needed to tie the perfect Christmas bow. Whether you prefer a classic or whimsical look, this article offers tips and tricks to customize your bow to suit your personal style.
With clear instructions and helpful visuals, you’ll be tying beautiful bows in no time. Spread some holiday cheer by adding the finishing touch to your gifts with a stunning handmade bow.
Read On
Get Creative with Christmas Decorations Bows: Simple and Elegant Ideas
Ah, Christmas—the season of joy, warmth, and timeless traditions. When it comes to festive...
10 Beautiful Ways to Incorporate Ribbon in Your Christmas Decorations
Get ready to deck the halls with ribbon galore! Christmas is undoubtedly the most magical time of...

The Ultimate Guide to Christmas Gift Wrapping
'Tis the season of merriment and joy, with a sprinkle of excitement in the air. As the holidays...