- Blog
- Christmas tree
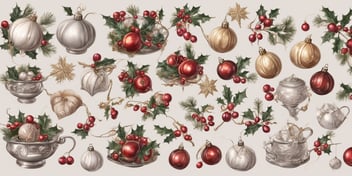
- 10 Festive Christmas Tree Quilt Patterns to Try this Holiday Season

Ah, the sweet scent of cinnamon wafting through the air, cozy winter nights spent by the fireplace, and of course, the beloved tradition of decorating the Christmas tree. This holiday season, why not add a touch of creativity and warmth to your decor by trying your hand at quilted Christmas tree patterns? Whether you're a seasoned quilter or just starting out, we've curated a delightful collection of 10 festive Christmas tree quilt patterns that will bring joy and charm to your home.
So grab your favorite mug of hot cocoa, settle into your comfiest chair, and let's explore these wonderful quilting projects that are sure to make your holiday season even merrier.
Getting into the Holiday Spirit with Christmas Tree Quilt Patterns
Getting into the holiday spirit is made easy with Christmas tree quilt patterns. These patterns evoke feelings of joy and nostalgia, bringing the festive atmosphere into your home. By creating a quilt adorned with Christmas trees, you can infuse your space with the charm and beauty of the holiday season. Whether you prefer a traditional or modern design, there are plenty of options to choose from.
Quilting enthusiasts can immerse themselves in the process of stitching together fabric pieces to form a delightful Christmas tree motif. The end result is a stunning quilt that not only keeps you warm but also serves as a delightful decoration during the holidays.
Classic Christmas Tree Quilt Pattern
Overview of the Classic Christmas Tree Quilt Pattern
The classic Christmas tree quilt pattern is a timeless design that captures the essence of the holiday season. It typically features a traditional tree shape with branches, trunk, and often a star or angel at the top. This pattern can be pieced together using various techniques such as patchwork or applique. The beauty of the classic design lies in its versatility - it can be customized with different fabrics, colors, and embellishments to suit your personal style.
Whether you prefer a rustic country vibe or a more modern aesthetic, the classic Christmas tree quilt pattern provides a solid foundation for creating a festive and cozy quilt.
Materials and Tools Needed
When diving into the world of Christmas tree quilt patterns, it’s important to have the right materials and tools on hand. First and foremost, you'll need a variety of fabrics in festive colors and patterns to bring your quilt to life.
Additionally, a rotary cutter and self-healing cutting mat will help ensure precise and clean cuts. To piece your quilt together, a sewing machine with a quilting foot and a set of quilting needles are essential. Don't forget about a good pair of fabric scissors, quilting pins, and a rotary ruler to assist with measuring and cutting accurately. Lastly, high-quality thread and batting will contribute to the durability and overall appearance of your quilt.
Step-by-Step Instructions
- Start by selecting your desired Christmas tree quilt pattern and gather the necessary materials and tools.
- Prepare your fabric by washing and ironing it to ensure a smooth and clean quilting process.
- Cut the fabric according to the pattern's instructions, paying attention to accurate measurements and precise angles.
- Begin assembling the quilt blocks, following the pattern's layout and placement guide.
- Use pins or clips to hold the fabric pieces together before sewing them with a sewing machine or hand stitching.
- Press the seams open or to the side to ensure a flat and professional-looking finish.
- Continue piecing the blocks together to form the quilt top, being mindful of matching seams and maintaining a consistent pattern.
- Layer the quilt top with batting and backing fabric, then secure the layers using pins or basting spray.
- Quilt the layers together by stitching along the design lines or using your preferred quilting technique.
- Finish the quilt by trimming excess fabric, adding binding, and giving it a final press.
Admire your beautiful Christmas tree quilt creation!
Remember to refer to the specific pattern instructions for any pattern-specific steps or variations. Happy quilting!
Tips and Tricks to Enhance Your Quilt
- Experiment with different fabric textures and patterns to create visual interest and depth.
- Use metallic or sparkly thread for quilting to add a touch of holiday shimmer.
- Incorporate applique or embroidery to depict ornaments, stars, or snowflakes on the tree.
- Consider adding quilted holly leaves or mistletoe as a border or decorative element.
- Play with the arrangement of your quilt blocks to create unique Christmas tree designs.
- Add a festive touch with buttons, beads, or ribbons as ornaments on the quilted tree.
- Use contrasting or complementary colors for the tree and background to make the design pop.
- Consider adding a quilted border with swirling patterns reminiscent of falling snow.
- Experiment with different quilting techniques, such as stippling or free-motion quilting, to add texture and dimension to your quilt.
Modern Twist on the Christmas Tree Quilt Pattern
Introducing a Contemporary Variation of the Christmas Tree
Embrace a fresh twist on the traditional Christmas tree quilt pattern by incorporating modern design elements. Consider using bold geometric shapes or abstract interpretations of trees to create a unique and eye-catching quilt. Experiment with unconventional color palettes, such as metallics or monochromatic schemes, to add a contemporary touch.
Additionally, explore unconventional quilt block layouts or asymmetrical designs for a more modern aesthetic. By infusing your Christmas tree quilt pattern with contemporary elements, you can create a visually striking and on-trend quilt that captures the festive spirit in a fresh and exciting way.
Materials and Tools Needed
When creating a Christmas tree quilt pattern, you'll need a few materials and tools to get started.
Firstly, gather a variety of fabric in different colors and patterns to add visual interest to your design. You'll also require a rotary cutter and cutting mat for precise fabric cutting. A sewing machine is essential for stitching your quilt pieces together, and make sure to have an assortment of quilting needles and thread for seamless quilting.
Additionally, have a ruler or quilting template for accurate measurements. Don't forget to stock up on batting and backing fabric to complete your quilt.
Step-by-Step Instructions
To create a Christmas tree quilt pattern, start by selecting your desired fabric colors and prints. Cut out triangular pieces for the tree and a rectangular shape for the trunk. Arrange the triangles in a tree shape on a large flat surface. Pin and sew the triangle pieces together along the edges, taking care to maintain the tree shape. Attach the trunk piece at the bottom of the tree. Once the tree block is complete, add borders or sashing if desired.
Finally, layer the quilt top with batting and backing fabric, then quilt and bind as desired.
Ideas for Personalization and Customization
When it comes to personalizing and customizing your Christmas tree quilt pattern, the options are endless. Experiment with different fabric choices to create unique tree designs. Consider incorporating applique or embroidery to add texture and detail. Play around with decorative stitching or quilting techniques for added visual interest.
Additionally, you can personalize your quilt by incorporating small embellishments such as buttons, beads, or ribbons. Feel free to explore different color palettes that match your personal style or the theme of your home decor. Don't be afraid to let your creativity shine and make your Christmas tree quilt pattern truly one-of-a-kind.
Scrap Buster Christmas Tree Quilt Pattern
Making the Most of Your Fabric Scraps
When working on a Christmas tree quilt pattern, making the most of your fabric scraps is a smart and budget-friendly approach. Instead of letting those small remnants go to waste, use them to add interest and texture to your quilt. Consider incorporating patchwork pieces or creating applique ornaments from your scraps. These can be strategically positioned on the tree branches to add pops of color and visual depth.
By utilizing your fabric scraps, you not only reduce waste but also add a uniqueand handmade touch to your Christmas tree quilt. So, gather those leftover fabric pieces and let your creativity shine.
Materials and Tools Needed
To get started on your Christmas tree quilt pattern, you'll need a few basic materials and tools.
First, gather your fabric in various colors and patterns to create the tree and background. Ensure you have a good pair of fabric scissors for precise cutting.
Additionally, you'll need a sewing machine or needle and thread, depending on your preference. Don't forget to have an iron and ironing board nearby to press your fabric as you sew. Lastly, consider using quilting rulers and rotary cutters to make accurate measurements and cuts. With these materials and tools on hand, you'll be ready to bring your festive quilt to life.
Step-by-Step Instructions
In the step-by-step instructions for creating a Christmas tree quilt pattern, start by selecting the fabric colors and prints that best represent the holiday spirit. Cut the fabric into the desired tree shapes and arrange them on the quilt top. Sew the pieces together using a quarter-inch seam allowance.
Next, add borders and a backing fabric. Layer the quilt top, batting, and backing together, then quilt using your preferred method.
Finally, bind the edges of the quilt for a finished look. Remember to press your quilt as you go to ensure precise stitching. With these simple instructions, you'll have a beautiful Christmas tree quilt in no time.
Tips for Organizing and Utilizing Scraps
- Sort your fabric scraps by color and size to make them easier to find and work with. This will save you time and ensure you have the right pieces for your Christmas tree quilt pattern.
- Keep a scrap bin or box near your work area to collect leftover fabric pieces. This way, you can easily access them when you need to add smaller details or fill in gaps in your design.
- Consider using a design board or wall to layout and arrange your scrap pieces before sewing them together. This will help you visualize the final look of your quilt and make better decisions on placement.
- Get creative with your scrap utilization! Consider cutting smaller shapes like triangles or squares to create ornaments or presents on your Christmas tree quilt. Mixing patterns and textures can add visual interest.
- Don't forget to save even the tiniest scraps, as they can be used for applique or as stuffing for ornaments or stuffed Christmas tree quilt designs.
- Finally, experiment with different techniques like patchwork or foundation piecing to efficiently use up your fabric scraps while adding unique elements to your quilt.
Remember, organizing and utilizing your fabric scraps can not only reduce waste but also add charm and personality to your Christmas tree quilt pattern.
Applique Christmas Tree Quilt Pattern
Adding Dimension and Texture with Applique Techniques
Adding dimension and texture to your Christmas tree quilt pattern can bring it to life. Applique techniques are a great way to achieve this. By layering fabric shapes onto your quilt, you can create a three-dimensional effect. Consider using different colors and patterns for the tree branches to add depth. Adding small details like buttons for ornaments or beads for snowflakes can also enhance the texture. Experiment with different fabrics such as felt or velvet to create contrast.
Applique allows you to play with texture and create a visually interesting quilt that captures the festive spirit.
Materials and Tools Needed
To bring your Christmas tree quilt pattern to life, you'll need a few basic materials and tools.
Firstly, gather a variety of festive fabric colors and patterns, allowing for creative diversity in your design. Don't forget to include a sturdy quilting cotton for the backing.
Additionally, a rotary cutter and self-healing cutting mat will make precise fabric cutting a breeze. Invest in a quality quilting ruler for accurate measurements and angles. A sewing machine with a variety of stitch options and a walking foot attachment will ensure smooth quilting. Basic sewing supplies like pins, needles, and thread in complementary colors are also necessary.
Finally, stock up on batting for quilt filling and consider using an iron and ironing board for crisp, professional-looking seams.
Step-by-Step Instructions
- Prepare your fabric and cutting tools before starting.
- Cut fabric into desired Christmas tree shapes, varying sizes for a more dynamic layout.
- Arrange the tree shapes on the quilt background, experimenting with different placements until satisfied.
- Pin the tree shapes in place and sew along the edges, securing them to the background.
- Consider adding additional elements like presents or ornaments using applique or embroidery.
- Once all pieces are securely attached, layer and baste the quilt top, batting, and backing.
- Quilt the layers together using your preferred technique, such as straight-line or free-motion quilting.
- Trim excess fabric and square up the quilt.
- Finish by binding the quilt edges, ensuring a clean and professional look.
- Give your quilt a final press and enjoy your beautiful Christmas tree quilt pattern creation!
Ideas for Embellishments and Embroidery
When it comes to embellishing and embroidering your Christmas tree quilt pattern, let your creativity shine. Add a touch of whimsy and sparkle by using metallic threads to stitch snowflakes or ornaments. Enhance the tree's texture by appliquéing beads or sequins as decorations. For a more rustic look, consider hand embroidering holly leaves and berries around the tree branches. Incorporate fabric scraps in different colors and patterns to create patchwork ornaments or a festive border.
Experiment with different embroidery stitches like French knots or satin stitches to bring depth and visual interest to your quilt. Remember, the possibilities are endless, so have fun and make it unique to your personal style.
Table Runner Christmas Tree Quilt Pattern
Creating a Festive Centerpiece for your Holiday Table
Create a festive centerpiece for your holiday table with a Christmas tree quilt pattern. This eye-catching table runner adds a touch of charm to your dining area. Choose fabrics in traditional holiday colors like red, green, and gold. Use applique techniques to add dimension to the tree design. Consider incorporating festive embellishments like buttons or sequins for extra sparkle. This centerpiece not only enhances your holiday décor but also protects your table from heat and spills.
It's a simple yet effective way to bring the Christmas spirit to your dining experience.
Materials and Tools Needed
To bring your Christmas tree quilt pattern to life, you'll need a few basic materials and tools. Start with a variety of cotton fabrics in festive colors and patterns, ensuring you have enough for the tree shape and background. You'll also need batting for added thickness and warmth. As for tools, a rotary cutter, cutting mat, and acrylic ruler are essential for precise fabric cutting.
Additionally, a sewing machine with a walking foot will help handle the layers of fabric smoothly. Don't forget to stock up on coordinating threads and basic sewing supplies like pins and scissors.
Step-by-Step Instructions
In the step-by-step instructions for creating a Christmas tree quilt pattern, start by selecting your desired fabric colors and patterns. Cut the fabric into squares, triangles, or any preferred shape for the tree and its ornaments. Arrange the cut pieces on a design wall or table to visualize the layout. Use a sewing machine to stitch the pieces together, starting with the tree and then adding the ornaments. Press the seams flat to ensure a neat finish.
Continue sewing the rows together until the quilt top is complete. Add batting and backing fabric, then quilt the layers together by using your preferred quilting technique. Lastly, bind the quilt edges to give it a finished look.
Tips for Selecting colors and Fabrics
When selecting colors and fabrics for your Christmas tree quilt pattern, opt for a palette that reflects the holiday spirit. Consider traditional colors like red, green, and gold for a classic look. Alternatively, experiment with non-traditional hues like silver, blue, or purple for a modern twist. Harmonize the colors by choosing fabrics with complementary patterns and textures. For instance, mix solid fabrics with prints featuring winter motifs or festive elements.
Don't be afraid to add a touch of sparkle with metallic fabrics or shimmering accents. Remember to strike a balance between bold and subtle to ensure a visually appealing and harmonious result.
Miniature Christmas Tree Quilt Pattern
Small-Scale Quilting for Big Holiday Charm
Small-scale quilting is a delightful way to add big holiday charm to your home decor. Miniature Christmas tree quilt patterns bring a touch of whimsy and can be completed in a fraction of the time compared to larger projects. These tiny quilts can be used as ornaments, wall hangings, or even as gift toppers. The key to achieving the desired effect is to pay attention to detail and use fabrics with festive prints or colors.
By reducing the scale, the intricate patterns of the Christmas trees become even more captivating. Experiment with different quilting techniques to make your mini quilt truly unique, such as applique or embroidery. Remember, it's the small things that often make the biggest impact!
Materials and Tools Needed
- Fabric: Choose various colors and patterns of fabric to create the tree, trunk, and background. Opt for cotton or flannel for a cozy feel.
- Batting: Provides the quilt's thickness and warmth, select a batting that suits the desired level of coziness.
- Quilting Ruler: Essential for measuring and cutting fabric accurately.
- Rotary Cutter and Cutting Mat: These tools make cutting fabric quicker and more precise.
- Sewing Machine: A reliable machine to stitch the quilt pieces together.
- Thread: Select thread colors that match or contrast with your fabric choices.
- Pins and Needles: Use pins to hold fabric layers together and needles for hand sewing.
- Scissors: Sharp fabric scissors for cutting thread, trimming fabric, and making precise cuts.
- Iron and Ironing Board: Pressing seams and fabric ensures a polished finished product.
- Quilting Gloves or Grippers: These help improve grip and control while working with the quilt layers.
- Quilting Template or Stencil: Optional, but they can assist in creating precise shapes and designs.
Remember, the materials and tools may vary depending on personal preference and the chosen Christmas tree quilt pattern.
Step-by-Step Instructions
For the step-by-step instructions of creating a Christmas tree quilt pattern:
- Start by selecting your desired fabric colors and patterns. These can range from traditional holiday hues to more whimsical choices.
- Cut out the pieces for your Christmas tree shape using a rotary cutter and a quilting ruler. Make sure to create a large triangle for the tree body and smaller triangles for the branches.
- Lay out the fabric pieces on your quilting workspace to plan the design and arrangement of the tree.
- Sew the fabric triangles together, starting from the bottom of the tree and working your way up. Use a quarter-inch seam allowance to ensure stability.
- Press the seams open or to the side, depending on your preference and the thickness of the fabric.
- Continue sewing the rows of fabric triangles together until you complete the entire tree shape.
- Layer the quilt top with batting and a backing fabric, then baste or pin the layers in place.
- Quilt the layers together using your preferred quilting technique, such as straight lines or free-motion quilting.
- Trim any excess batting and backing fabric, and square up the quilt edges.
- Finally, bind the quilt with a complementary fabric, sewing it around the edges to give the quilt a finished look.
Remember to adapt these instructions to fit your specific pattern and design choices, but above all, enjoy the process of creating your own festive Christmas tree quilt.
Ideas for Displaying and Gifting Mini Quilts
- Wall Display: Hang mini quilts featuring Christmas tree quilt patterns on a designated wall using decorative clips or mini hangers.
- Tabletop Decor: Place mini quilts on side tables, mantels, or shelves as festive accents. Coordinate with other holiday decor elements like candles or figurines.
- Ornament Additions: Turn mini quilts into ornaments by attaching a string or ribbon to the top. Hang them on your Christmas tree or gift them to loved ones.
- Gift Enclosure: Use mini quilts as unique and creative gift wrap alternatives. Wrap small presents, like jewelry, in mini quilts for an extra special touch.
- Coaster Set: Stitch multiple mini quilts together to create a set of festive coasters.
These make adorable Christmas gifts or party favors.
Remember to choose complementary colors and fabrics that match the recipient's style or home decor. The possibilities for displaying and gifting mini quilts are endless, offering a personal and heartwarming touch to the holiday season.
Summary
Get in the holiday spirit with these 10 festive Christmas tree quilt patterns! Whether you're a seasoned quilter or just starting out, there is something for everyone to try this holiday season. From traditional designs to modern twists, these patterns offer a variety of styles to choose from. Break out your fabric stash and let your creativity shine as you create beautiful quilts adorned with Christmas trees.
With step-by-step instructions and helpful tips, these patterns make it easy for quilters of all skill levels to create stunning holiday-themed quilts. Spread the joy and warmth by gifting these quilts to loved ones or using them as festive decorations in your own home.
Read On

Cozy up with a Christmas Tree Quilt: A Festive DIY Project
The holiday season is upon us! As we bid farewell to the amber hues of autumn, it's time to embrace...

Craft the Perfect Christmas Tree Skirt with our Easy-to-Follow Pattern
Ah, tis' the season to don our homes with festive ornaments, merry lights, and of course, the pièce...
DIY Delights: How to Make Homemade Christmas Tree Ornaments
As the holiday season approaches, there's something magical about the twinkling lights and festive...